Spring Chimney Inspection Seattle: What Gets Checked and Why It Matters
Why Spring Is the Best Time for a Chimney Inspection in Seattle
Most Seattle homeowners think of chimney inspections as a fall task — something to check off before lighting the first fire of the heating season. And fall inspections are genuinely important. But spring inspections catch a category of damage that fall inspections routinely miss: the cumulative effect of Seattle's wet winter on chimney masonry, crowns, flashing, and caps.
Seattle's winters deliver rain from October through March, with enough freeze-thaw cycling to fracture mortar joints, crack chimney crowns, and compromise flashings that were borderline in the fall. By May, that damage has been sitting there for months — taking on water with every rainstorm, progressing from a manageable repair into a more expensive one. A spring inspection identifies this damage at the point when repair costs are still modest, and before another 18 months pass without attention.
Spring timing also matters for two other reasons specific to the Pacific Northwest. First, May is the beginning of wildlife nesting season in Seattle — squirrels, raccoons, and birds (particularly chimney swifts and European starlings) actively move into uncapped or damaged chimneys in spring. An inspection now catches wildlife activity before a nest becomes established, which complicates removal significantly. Second, the spring shoulder season is when chimney inspection scheduling is easiest — fall appointments, especially October through November, book 2-4 weeks out as every homeowner calls simultaneously before winter.
CSIA and NFPA 211 both recommend annual chimney inspection for any chimney in regular use. If your last inspection was before fall 2024, this spring is the right time to schedule one. Our chimney inspection cost guide covers what to expect to pay for Seattle-area inspections by inspection level.
The Exterior Inspection: Crown, Cap, and Masonry
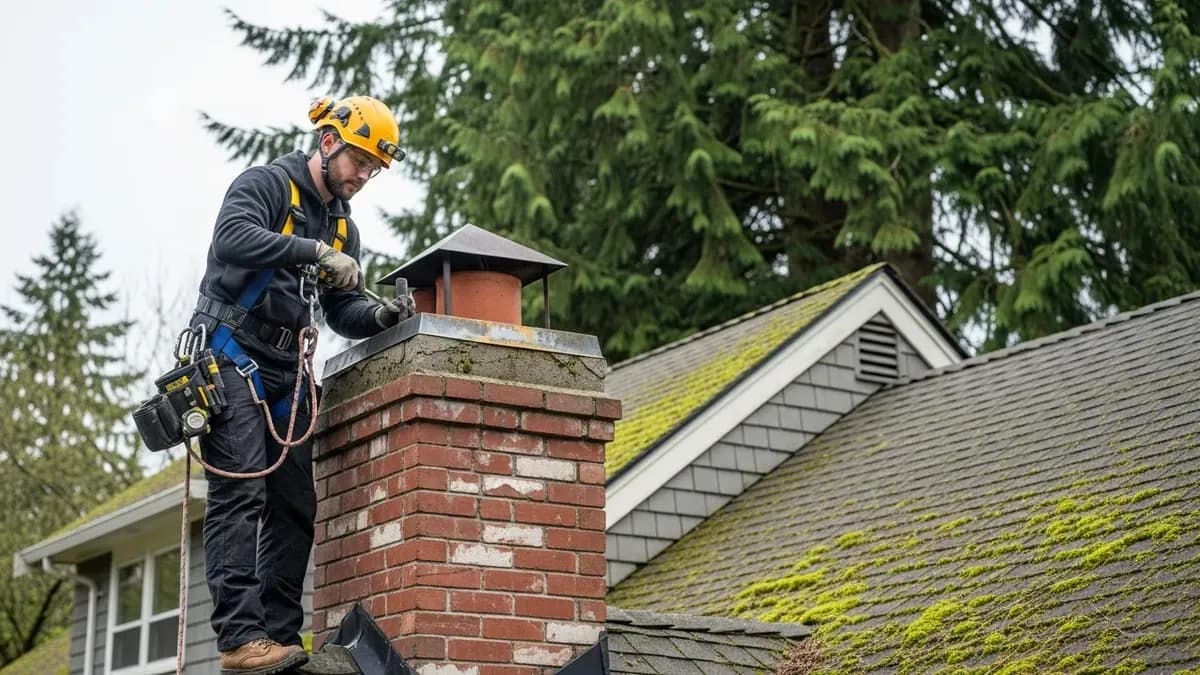
A thorough chimney inspection begins outside and on the roof — the exterior tells much of the story before the inspector ever looks inside the flue. In our 14+ years working on Seattle rooftops, the exterior is where we find the majority of the issues that lead to interior damage: failed crowns, damaged caps, deteriorated mortar, and spalling brick that has been slowly admitting water since the previous fall.
Chimney Crown Inspection
The crown is the first thing an inspector examines from the rooftop. In Seattle, we find crown cracking on the majority of chimneys that have not had recent work — the combination of Portland cement (which does not flex), Pacific Northwest temperature swings, and direct rain exposure creates ideal conditions for crown failure. The inspector checks for:
- Visible surface cracks, especially radiating from the flue liner collar where thermal movement is greatest
- Sections of crown that have broken away entirely, leaving the masonry below exposed
- Crowns that are flush with the chimney face rather than extended with a drip edge — a common older construction method that channels water into the masonry
- Signs of prior repair that has itself failed or lifted
Chimney Cap Inspection
After winter, cap damage is common — particularly on chimneys below Seattle's large deciduous trees. Branch strikes bend and displace caps; freeze-thaw cycling loosens caps that were improperly fastened. The inspector checks for missing caps, damaged or corroded mesh screens, and any evidence of animal entry. May is peak nesting season, so a cap in even marginal condition should be assessed promptly.
Masonry and Mortar Inspection
The inspector examines all visible masonry on the chimney exterior for mortar joint deterioration, spalling brick, efflorescence (white mineral staining indicating water migration), and any structural cracking. On Seattle's Craftsman and Victorian homes, the inspector also looks for signs that prior repair used Portland cement rather than appropriate lime mortar — a finding that sometimes requires remediation before new tuckpointing can be done correctly. For details on what masonry repairs involve and cost, see our guide to common chimney repairs in Seattle.
Flashing Inspection: The Chimney-Roof Junction
Chimney flashing — the metal barrier sealing the junction between the chimney and the roof surface — is one of the most common sources of chimney-related water damage in Seattle homes, and one of the areas where a professional inspection adds the most value over a homeowner's visual check. From the ground or even from inside the attic, flashing failures are nearly impossible to diagnose reliably. From the rooftop with hands-on access, they are straightforward to assess.
During a spring inspection, the inspector checks:
- Counter-flashing embedment in the mortar joints — whether it is mechanically anchored or just surface-caulked, and whether any sections have pulled free from the masonry
- Step flashing integration with the roof shingles along the chimney sides — whether it has shifted or whether shingle movement has created gaps
- The back pan flashing behind the chimney, where water runoff from the upper roof concentrates — often the highest-volume water contact point on the entire chimney
- Condition of sealant at all flashing transitions — Seattle's wet climate degrades caulk and sealant at the chimney perimeter significantly faster than in drier regions
- Signs of prior water intrusion in the roof deck and adjacent sheathing visible from above
Active flashing failures that have allowed water entry over the winter are high-priority repairs — one Seattle rainy season with a failed flashing can introduce significant moisture into wall framing and ceiling assemblies. Our chimney flashing repair service includes a complete assessment of adjacent shingles and masonry to ensure no secondary entry points are missed. See our flashing repair cost guide for pricing expectations.
Inside the Flue: Liner, Smoke Chamber, and Damper Inspection
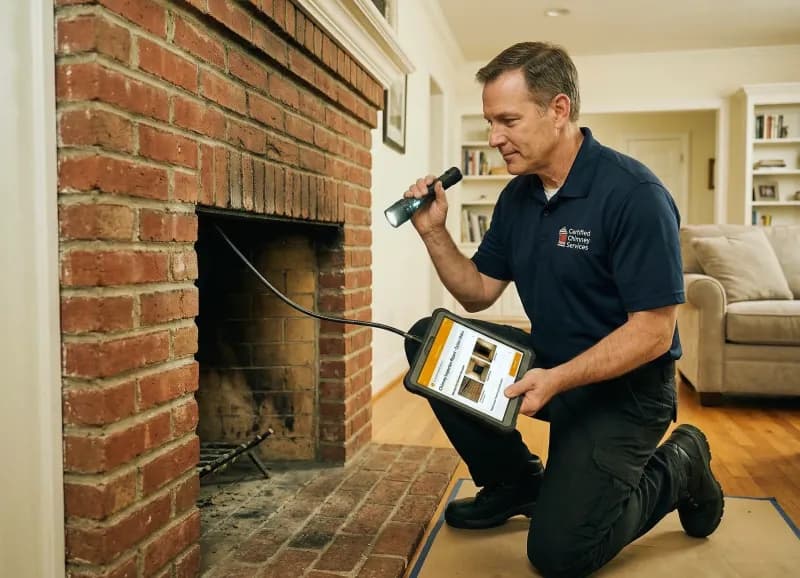
After the exterior, a thorough spring inspection moves to the flue interior using a specialized camera system — the only reliable way to assess liner condition in a chimney that cannot be directly observed by eye. NFPA 211 defines three levels of inspection; most residential spring inspections are Level 1 (accessible components, no obstructions, no appliance changes) or Level 2 (full camera scan of the flue interior, required when appliances are changed or after events like chimney fires or earthquakes).
Liner Inspection
The flue camera travels the full height of the liner, providing a documented record of liner condition. In Seattle homes, the inspector is looking for:
- Clay tile liner cracks, joint separation, or collapsed sections — common in Seattle's pre-1960 housing stock after decades of thermal cycling
- Stainless steel liner joint integrity — whether any connectors have separated from the thermal cycling of the heating season
- Creosote accumulation — glazed (Stage 3) creosote requires chemical treatment before standard sweeping and indicates the chimney has been operating with insufficient draft or airflow
- Any liner condition that warrants reclassifying the inspection to Level 2 for full video documentation
If the liner shows significant deterioration, use of the fireplace should be suspended until relining is complete. Our chimney liner replacement guide explains the relining options in detail.
Smoke Chamber Inspection
The smoke chamber — the expanding space between the damper and the flue liner — is a common area for mortar joint deterioration and corbeled brick cracking. The inspector checks for open mortar joints, exposed parge coat failures, and any intrusion of liner material. A deteriorated smoke chamber can be restored with a cast-in-place parge coat product without a full firebox rebuild in most cases.
The Firebox: What Inspectors Look For Inside
The firebox inspection covers the refractory materials and components that experience the highest heat and the most direct exposure to combustion byproducts. In Seattle homes, water infiltration from failed crowns, caps, or flashings is a major contributor to firebox deterioration — moisture accelerates refractory joint cracking and causes corrosion of the damper assembly significantly faster than normal thermal wear.
Refractory Condition
The inspector examines the firebox floor, side walls, and back wall for:
- Refractory mortar joint cracking — hairline cracks are normal and expected; cracks wider than 1/4 inch, or any crack that has progressed through the full depth of a joint, warrant repair
- Spalling or pitting of the refractory brick face surface — often indicates prolonged water contact rather than heat damage alone
- Separation of the firebox wall assembly from the surrounding masonry backing — a finding that requires more comprehensive repair
- Signs of prior fire in the liner or smoke chamber — discoloration patterns and soot deposition outside normal zones indicate a past chimney fire that may have compromised the liner
Damper Inspection
The throat damper above the firebox opening is assessed for freedom of movement (it should open and close fully), corrosion, and the condition of the damper plate and frame. In Seattle homes where water has been entering through the flue for multiple seasons, damper corrosion is extremely common — a damper frozen in the open position wastes significant heat throughout Seattle's long heating season, while one frozen closed creates a safety hazard during fireplace use. The inspector will note whether the damper meets the minimum open area requirement for the fireplace dimensions under NFPA 211 standards. Our guide to chimney inspection levels explains how NFPA 211 Level 1 and Level 2 inspections differ and when each is appropriate.
Wildlife and Debris Checks: May's Special Concern
May is the single most active month for chimney wildlife entry in Seattle, and a spring inspection always includes a specific check for current or recent animal activity. Seattle's urban wildlife population — which includes raccoons, gray squirrels, European starlings, house sparrows, and chimney swifts — regards uncapped or damaged chimneys as ideal nesting sites: dry, elevated, and protected from predators.
What Inspectors Look and Listen For
- Nesting material in the smoke chamber or on the damper — a classic sign of spring bird or squirrel activity
- Audible animal sounds — young animals in the flue are sometimes detectable by sound before they are visible on camera
- Fecal material in the firebox — raccoon latrines in chimney tops are a health risk requiring professional removal and sanitization
- Feathers, fur, or debris at the firebox opening — materials that have fallen from an active nest above the damper
- Chimney swift activity at the top of the flue — chimney swifts are a federally protected migratory species under the Migratory Bird Treaty Act, and active swift nests cannot legally be removed until the birds have completed the nesting cycle and departed
Wildlife found during a spring inspection changes the repair timeline significantly. Raccoon and squirrel infestations should be addressed immediately by a licensed wildlife removal professional before chimney repairs are completed. Bird nests in the smoke chamber are typically removable and swept clear when not actively occupied. Chimney swift activity requires waiting until the nesting season ends — typically late August — before cap installation can proceed. Our guide to birds and animals in Seattle chimneys covers the removal process and what each species requires.
What Seattle Inspectors Find Most Often in Spring
After 14+ years of spring inspections across more than 2,500 Seattle-area homes, we see a consistent pattern of findings that are heavily influenced by the severity of the preceding winter and the age of the home's chimney system. The following table summarizes what we find most frequently in our spring inspection work:
| Finding | Frequency in Spring Inspections | Common Homes Affected | Typical Repair Cost |
|---|---|---|---|
| Mortar joint deterioration (tuckpointing needed) | ~65% of inspections | Pre-1970 homes throughout Seattle metro | $500 – $2,500 |
| Crown cracking (minor to severe) | ~55% of inspections | All ages, especially chimneys without prior waterproofing | $250 – $2,000 |
| Flashing separation or sealant failure | ~40% of inspections | Homes 15+ years since last flashing work | $400 – $2,000 |
| Cap damage or missing cap | ~30% of inspections | Homes near mature trees or on exposed ridgelines | $100 – $500 |
| Damper corrosion or restricted movement | ~30% of inspections | Chimneys with prior water infiltration history | $150 – $500 |
| Wildlife entry (nesting or evidence) | ~20% of spring inspections | Uncapped or damaged cap chimneys | $200 – $800 removal + cap |
| Clay liner cracking (moderate to severe) | ~15% of inspections | Pre-1960 homes with original clay tile liners | $2,500 – $5,500 relining |
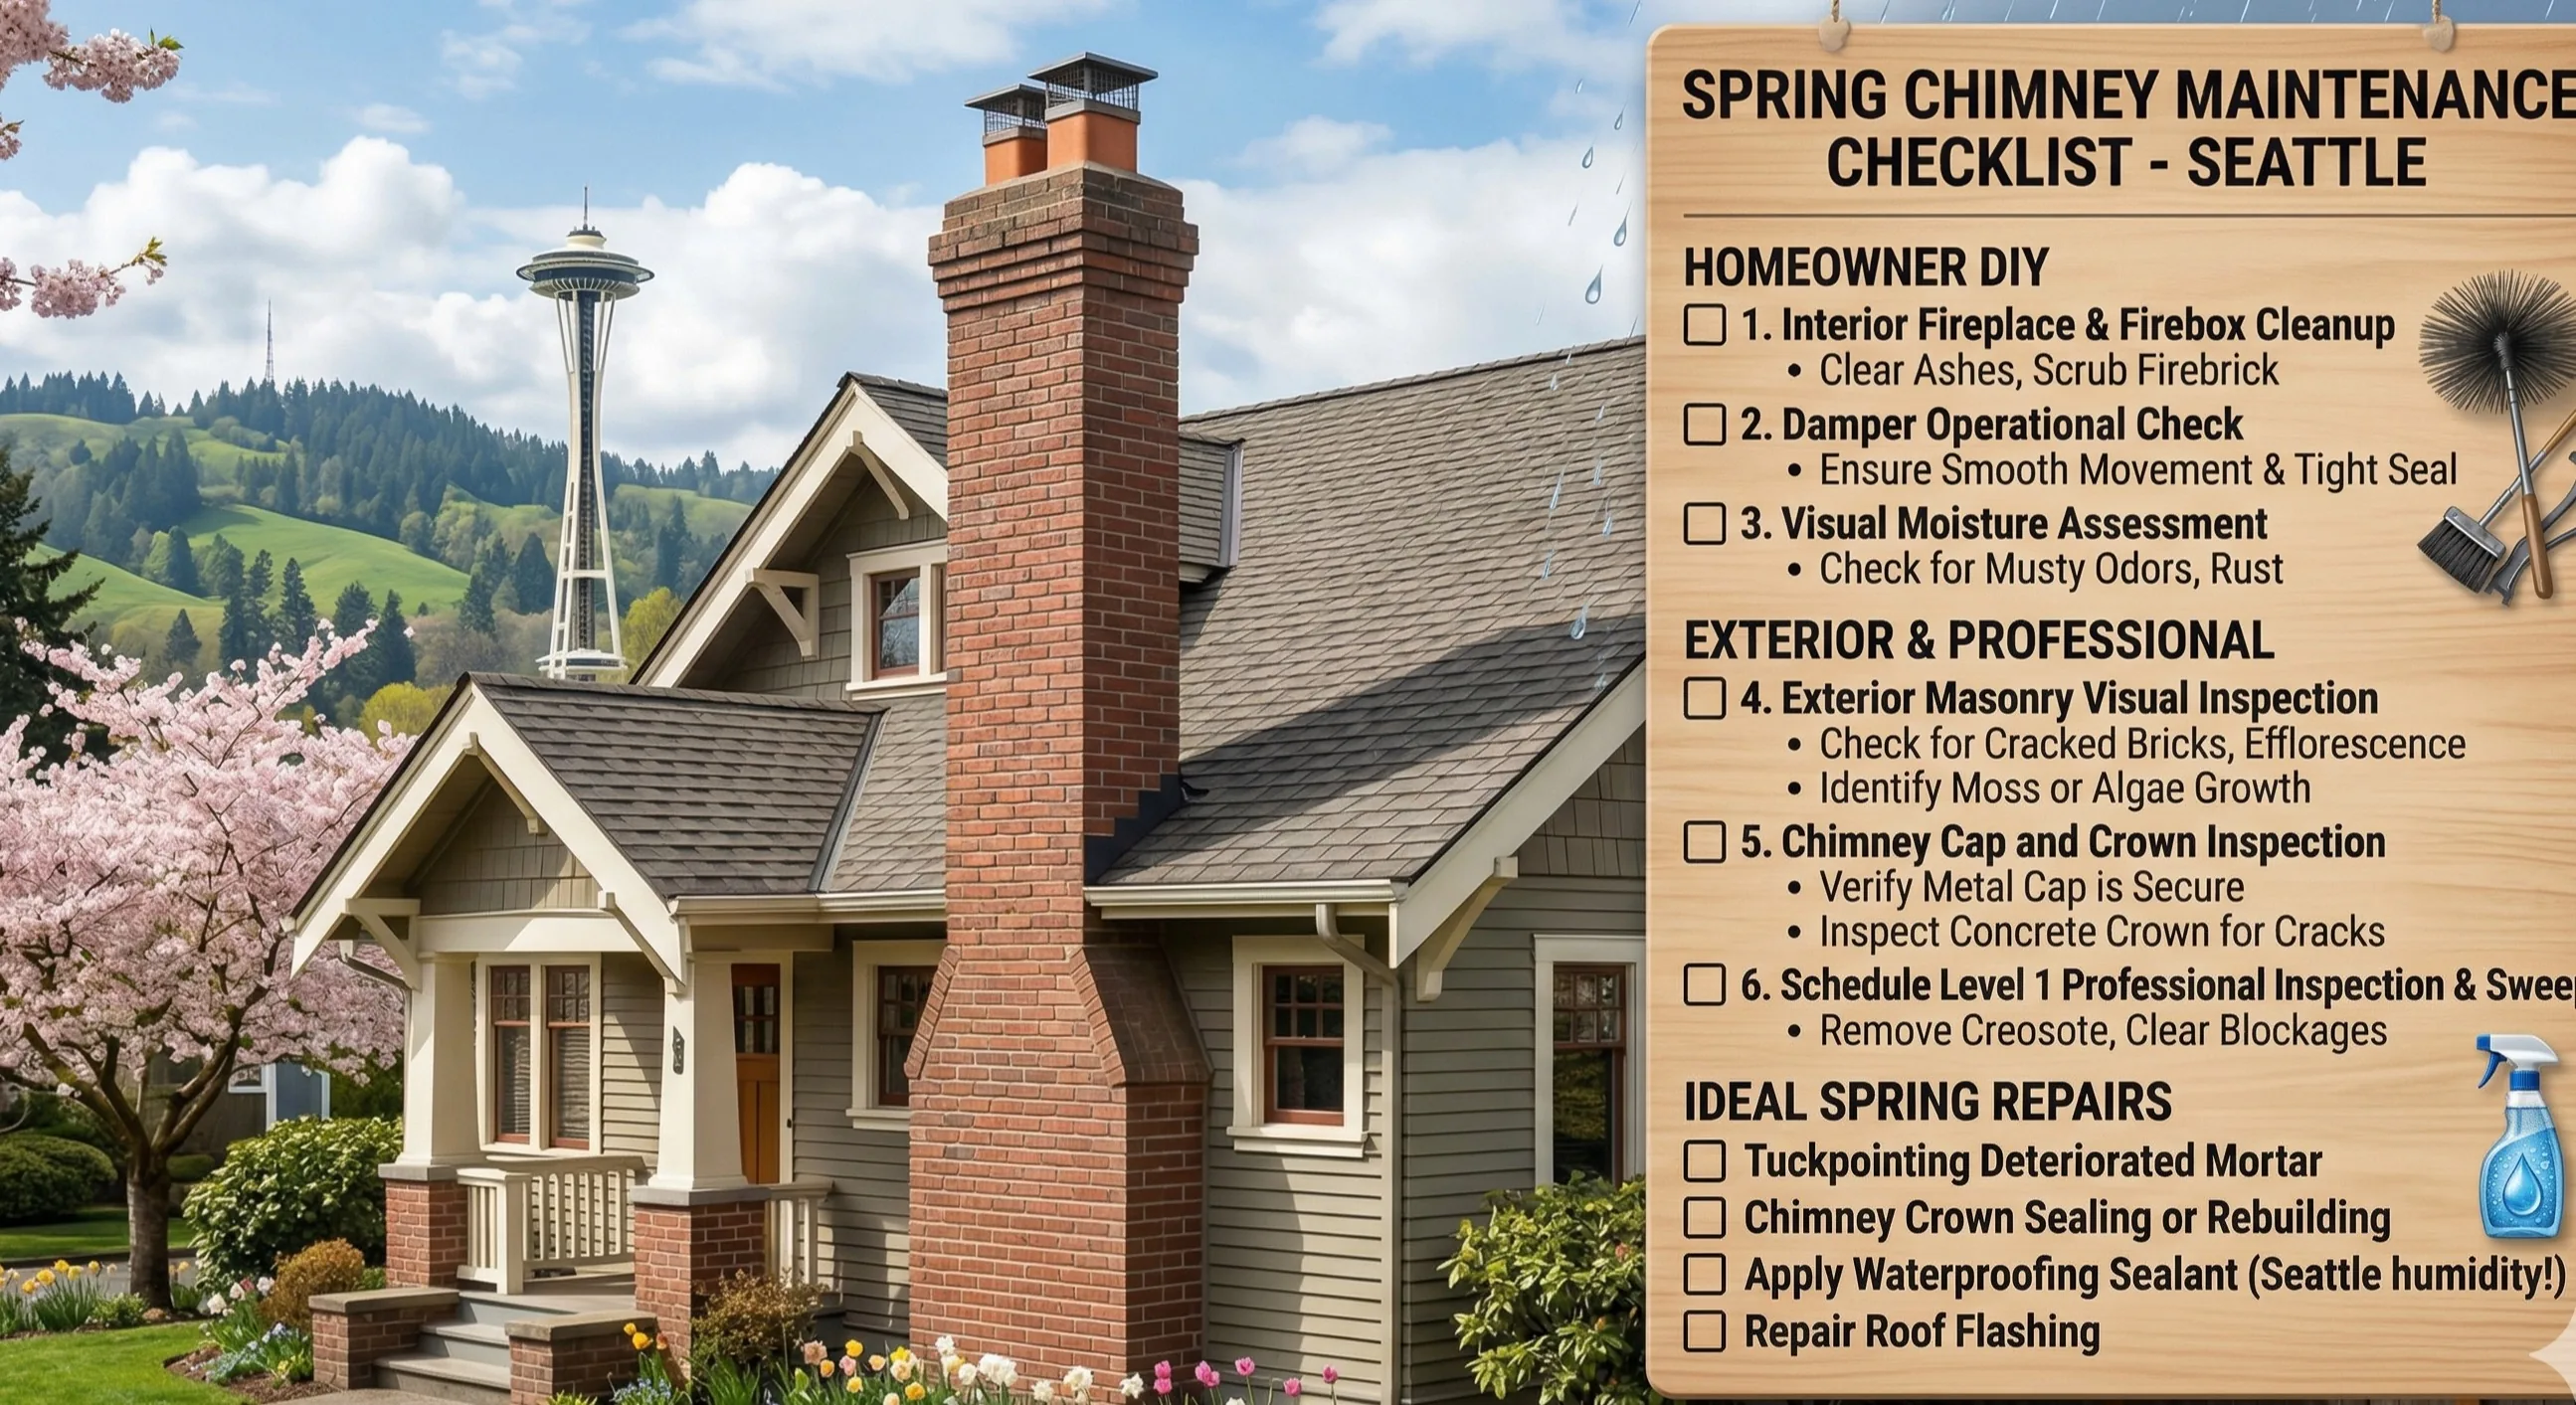
These frequencies reflect our Seattle and greater King County service area — the numbers in Tacoma and older Bellevue neighborhoods with similar housing stock are comparable. In newer construction (post-1990), the frequency of mortar and crown issues is lower, but liner and gas appliance-related findings are proportionally higher. Our spring chimney maintenance checklist covers the homeowner-accessible checks you can do between professional inspections.
After the Inspection: Reading Your Report and Scheduling Repairs
A professional chimney inspection should produce a written report — not just a verbal summary — documenting each finding, its severity, and the recommended action. At Seattle Chimney Pros, every inspection generates a written report with photographs of each finding so you have a clear visual record of what was identified and where.
How to Prioritize Your Findings
Inspection reports vary in how they present urgency. Look for these categories in your report:
- Safety findings (act before next use): Liner deterioration with exposed gaps, smoke chamber openings, or compromised firebox components. Do not use the fireplace until these are addressed.
- Water entry findings (act within weeks): Active flashing failures, missing or damaged caps, and severe crown cracking. In Seattle, even a few weeks of delay means additional water infiltration through the ongoing rainy season.
- Deterioration findings (schedule this season): Mortar repointing, minor crown cracking, and damper issues. These are not emergencies, but addressing them this spring prevents a more expensive repair by fall.
- Monitor findings (inspect again next year): Minor refractory joint cracking, minor efflorescence, or early-stage mortar softening. The inspector may recommend monitoring these to assess progression rate before committing to repair.
Getting Repair Estimates After an Inspection
Ideally, get your inspection from a company that does not simultaneously push high-pressure repair authorization during the inspection itself. Review the written report, understand the findings, and request a separate written, itemized estimate for any recommended repairs. If the finding is a safety issue, do get the estimate promptly — but a legitimate inspector gives you time to review and decide without manufacturing urgency. For context on what each repair type should cost in Seattle, our chimney inspection cost guide and repair cost resources give you the benchmarks you need to evaluate estimates fairly.
Schedule Your Spring Chimney Inspection With Seattle Chimney Pros
Seattle Chimney Pros performs spring chimney inspections across the Seattle metro — from Capitol Hill and Queen Anne to Ballard, Bellevue, and Tacoma. Every inspection is performed by a CSIA-certified technician who inspects from the roof, documents findings with photographs, and delivers a written report before leaving your property. We serve more than 400 homes per year in inspection and maintenance work, and we have been family-owned and operating in the Seattle area since 2011.
Our spring inspection process includes: exterior masonry, crown, cap, and flashing assessment from the rooftop; flue camera scan when warranted by findings or requested; firebox, damper, and smoke chamber inspection from inside; wildlife and debris check; and a written summary of all findings with photographs. We do not begin repair work on the same visit as an inspection without your explicit authorization — every finding is documented and discussed before any repair is proposed.
Spring appointments book faster than most homeowners expect — if you have been meaning to schedule an inspection since last fall, the best time to book is now. To schedule a spring chimney inspection, call (253) 429-8006 or request an appointment online. Most spring appointments are available within 5-7 business days, with priority availability for active leaks or safety concerns reported at booking.
Need professional help?
Our professionally trained team is ready. Free estimate, 30-minute response.