Chimney Repair After Winter in Seattle: Freeze-Thaw Damage Explained
Why Seattle Winters Are Especially Hard on Chimneys
Seattle records about 152 rain days per year — more than twice the national average — and its winters spend a disproportionate amount of time cycling through the narrow temperature band between 28°F and 38°F that does the most damage to masonry. Not below freezing all winter and not above freezing all winter, but oscillating through the freeze-thaw range repeatedly throughout the season. That cycling is what cracks Seattle chimneys.
In colder northern cities like Minneapolis, winter temperatures drop and stay below freezing for weeks at a time. Water in masonry freezes once and stays frozen. In Seattle, a wet storm brings 38°F air and soaks the chimney, temperatures drop to 27°F overnight and the water in the mortar joints freezes and expands, then the afternoon warms to 42°F and everything thaws again. Repeat 30 to 50 times over a Seattle winter. Each cycle works the crack a little wider. By spring, mortar joints that were marginal in October are failing, hairline crown cracks have grown, and flashings that were borderline have separated.
Seattle's vegetation compounds the problem significantly. Moss and lichen — present on the rooftops and chimney surfaces of most homes more than ten years old in Capitol Hill, Queen Anne, Ballard, and Bellevue — hold moisture against masonry surfaces for weeks at a time. A Seattle chimney with active moss growth stays wet through freeze events even when surrounding masonry might otherwise have dried. That sustained moisture contact dramatically accelerates freeze-thaw deterioration compared to what the weather data alone would suggest.
The housing stock matters too. Seattle has a large inventory of pre-1940 Craftsman bungalows and Victorian homes built with softer historic brick and lime mortar. These materials are more porous and more vulnerable to water infiltration than modern brick. In our 14+ years performing chimney repair across the Seattle metro, we see consistently more severe post-winter damage on pre-1950 homes than on mid-century or newer construction. But no era of chimney is immune — the freeze-thaw mechanism works on all masonry, just faster on more porous material.
The Freeze-Thaw Mechanism: How Water Destroys Chimney Masonry
Understanding why Seattle winters damage chimneys requires understanding the physics of what happens inside masonry during a freeze-thaw cycle. Brick and mortar are both porous materials — they absorb water through their surfaces and hold it in microscopic pores throughout their interior. This absorption is normal and not in itself a problem. The problem begins when the temperature drops below 32°F.
Water expands by approximately 9% when it freezes. Inside a mortar joint or brick pore, that expansion has nowhere to go — it applies outward pressure on the surrounding material. On the first freeze-thaw cycle, the crack that forms may be microscopic. But each subsequent cycle introduces more water into the slightly enlarged crack, the freeze expands it further, and the crack grows. Over 30 to 50 cycles in a Seattle winter, microscopic cracks become visible ones, and visible ones become structural failures.
Different chimney components experience this damage differently. Mortar joints are the first to show failure because mortar is more porous than the brick it joins. The joints between bricks act as the chimney's sacrificial layer — they absorb and release water more readily than the brick faces, and they deteriorate first. Once mortar joints fail, water gains direct access to the brick interior and the cycle accelerates. Next to fail is typically the chimney crown — the concrete cap at the chimney top that is directly exposed to every rainstorm with no protection above it. Crowns are thin and relatively flat, and the thermal expansion stresses they experience are greater than any other chimney component.
Efflorescence — the white mineral staining visible on brick chimney faces — is often the first homeowner-visible sign that freeze-thaw deterioration has been occurring. Efflorescence is caused by water carrying soluble minerals out of the masonry and depositing them on the surface as it evaporates. Seeing it is not an emergency on its own, but it is a reliable indicator that water has been moving through the chimney masonry for at least one season. Our guide to white stuff on chimney bricks covers efflorescence in detail, including when it requires action versus monitoring.
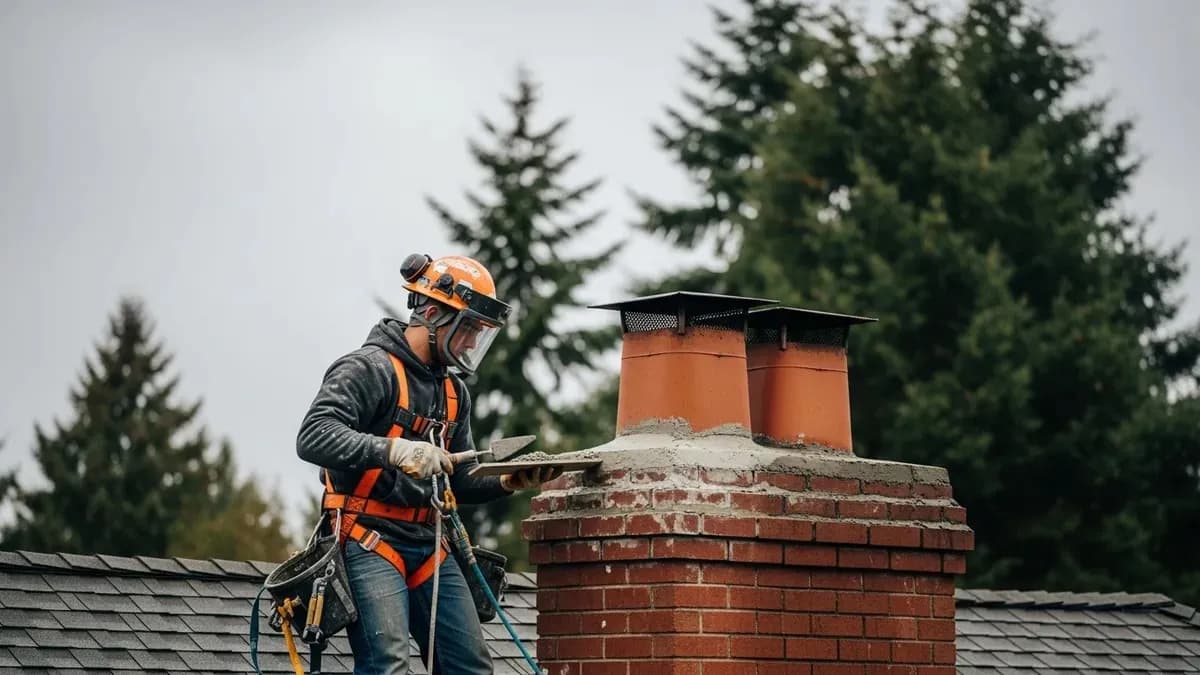
Crown Cracking: Seattle's Most Common Post-Winter Finding
The chimney crown — the concrete or mortar slab that seals the top of the chimney, extending from the edge of the chimney face to the flue liner collar — is the component we find damaged most frequently during spring inspections. Crowns bear the full impact of Seattle's rainfall directly, with no protection above them, and Portland cement crowns are brittle and prone to cracking from thermal movement. We estimate crowns show some degree of cracking on over half of Seattle-area chimneys that have not had chimney work in the past ten years.
Crown cracking matters because water that enters through a cracked crown does not stay at the top of the chimney. It travels down inside the chimney structure, reaching mortar joints, the liner, the damper, and ultimately the firebox. A cracked crown that goes through a second Seattle winter without repair accelerates deterioration in every component below it. The repair scope and cost of deferred crown failure is almost always higher than the crown repair alone.
Types of Crown Damage Found After Winter
- Hairline cracks: Fine surface cracks radiating from the flue collar or running along the crown surface. In Seattle, these require sealing with an elastomeric crown sealant — a flexible, water-resistant material that bridges the crack. Cost: $250–$500.
- Structural cracks: Wider cracks exceeding 1/4 inch, cracks that penetrate the full depth of the crown, or cracks with differential movement on either side. These indicate the crown is no longer an effective water barrier and typically require a full rebuild. Cost: $600–$2,000.
- Delamination or collapse: Sections of the crown physically breaking away, exposing the masonry below. Immediate repair is warranted — fallen crown material can damage roofing and water entry is uninhibited. Cost: $800–$2,200 including cleanup and rebuild.
- Flush crowns (older construction): Crowns built flush with the chimney face that lack a proper drip edge. These channel water directly into the masonry rather than away from it and are best rebuilt with proper overhang profile when repair is done.
Crown inspection requires rooftop access — the cracks visible from the ground through binoculars represent only the most severe damage. Our chimney crown repair cost guide details every repair option and the factors that influence price in the Seattle metro.
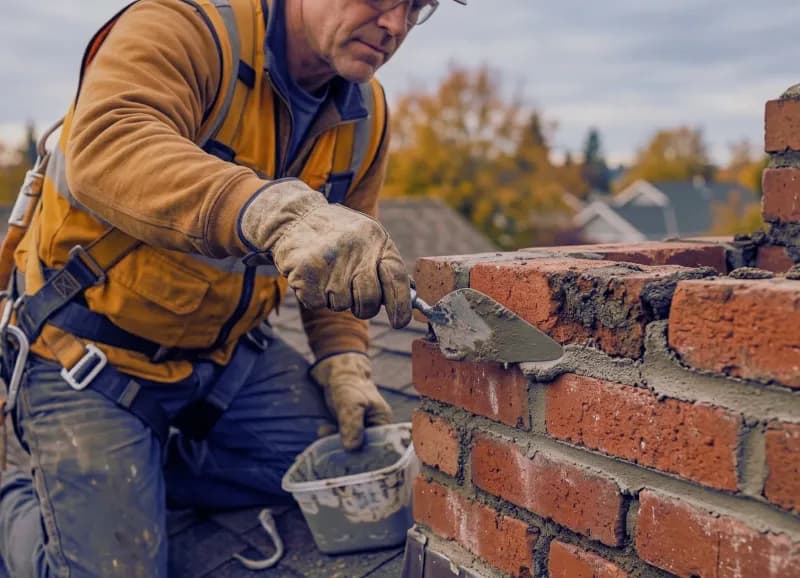
Mortar Joint Failure: How to Spot It and Why It Matters
Mortar joint deterioration is the most statistically frequent chimney repair need across Seattle, appearing in roughly 65% of our spring inspection findings across Queen Anne, Capitol Hill, Ballard, and the greater King County service area. The good news is that mortar joint deterioration is one of the repairs most visible from the ground — you do not need a ladder or camera to recognize when tuckpointing is needed. The challenging news is that visible mortar deterioration typically indicates the joints have been failing for at least two to three Seattle winters, meaning adjacent brick has been absorbing water the entire time.
Ground-Level Signs of Mortar Failure
- Mortar joints that appear visibly recessed between the brick faces — in sound mortar, the joint face is approximately flush with the brick; recessed mortar by 1/4 inch or more indicates significant erosion from freeze-thaw cycling
- White powdery staining (efflorescence) on brick faces adjacent to mortar joints — minerals leaching out of the masonry as water moves through failing joints
- Crumbled or absent mortar in isolated joints, particularly at chimney corners and the crown transition — areas that experience the greatest freeze-thaw movement
- Brick faces beginning to flake or delaminate at their outer surfaces — spalling that often begins at the brick-mortar interface when water infiltration has been progressing for several seasons
The Lime Mortar Issue on Seattle's Historic Homes
For homeowners in Seattle's pre-1940 neighborhoods — the Craftsman and Victorian homes of Ballard, Queen Anne, Columbia City, and Capitol Hill — mortar repair requires particular care. The original brick in these homes is soft historic brick, fired at lower temperatures and more porous than modern brick. It was designed to pair with lime mortar, which is softer and more flexible than modern Portland cement. When contractors repair these chimneys using Portland cement mortar, the harder cement traps water in the soft brick and causes the brick face itself to spall — often accelerating damage rather than stopping it.
In our experience across Seattle's historic neighborhoods, we have remediated dozens of cases where well-intentioned Portland cement repairs caused significant brick spalling damage. If your pre-1940 home needs mortar repair, always verify that your contractor will use lime mortar matched to the original joint profile. Our chimney repair team uses lime-based mortar on all historic masonry work. For full pricing, see our Seattle tuckpointing cost guide.
Chimney Flashing: Where Winter Water Enters Without Announcement
Chimney flashing — the metal barrier sealing the joint between the chimney and the roof surface — is the component where winter water damage is most consequential and most easily missed. Unlike crown cracking or mortar deterioration, flashing failure produces no obvious visual cue from the ground. The evidence shows up on interior ceilings and walls near the fireplace, or in attic sheathing visible only from above. By the time interior water damage appears, the flashing failure has typically been active for multiple rainstorms across a Seattle winter.
Seattle's winter conditions accelerate flashing failure in several specific ways. The temperature cycling that stresses mortar and crowns also works at the flashing-to-masonry interface: counter-flashing embedded in chimney mortar joints expands and contracts with the masonry, working its way loose over years of cycling. Roof shingles below the step flashing shift as the decking expands and contracts with moisture changes. Caulk and sealant at flashing transitions — which are present on many Seattle homes as the primary sealing method rather than properly embedded metal — dry and crack through successive wet-dry cycles.
After a Seattle winter, the flashing areas most likely to show new failure include:
- The back pan flashing behind the chimney — where roof runoff from above the chimney concentrates and creates the highest sustained water contact point on the entire assembly
- Counter-flashing that was surface-caulked rather than embedded in mortar joints — these sealant-only repairs typically last 3–7 years in Seattle's climate before failing
- Step flashing at the chimney sides where seasonal shingle movement has created gaps and separation
- Any flashing transition sealed with standard exterior caulk rather than a high-movement sealant product formulated for chimney-roof interfaces
An active flashing failure in Seattle is a high-priority repair — not because it threatens structural safety immediately, but because every rainstorm introduces more water into roof framing, wall cavities, and ceiling assemblies below. Water remediation costs for a flashing failure that has been active through a full Seattle rainy season routinely run $3,000–$10,000. Our chimney flashing repair service includes assessment of adjacent roof components to ensure no secondary entry points are missed. See our chimney flashing repair cost guide for pricing details.
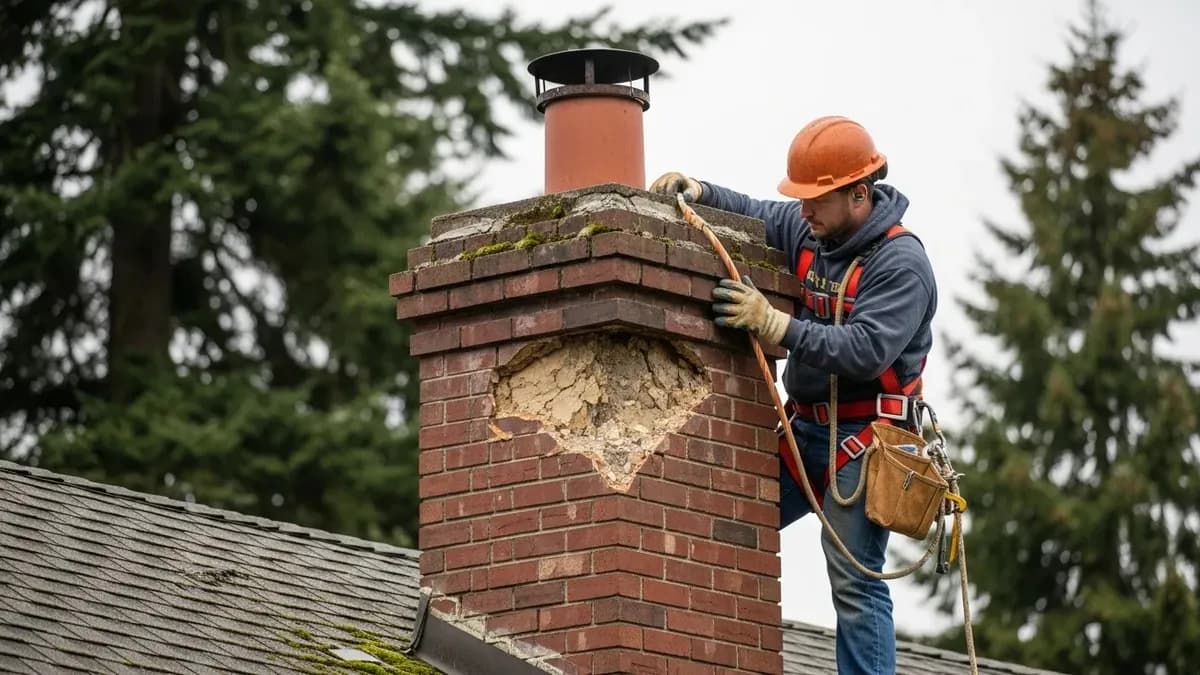
Brick Spalling: When Freeze-Thaw Has Already Gone Too Far
Brick spalling — the physical separation and flaking of the outer brick face from the body of the brick — is the most dramatic visible sign of advanced freeze-thaw damage. By the time spalling is visible on a chimney, the cycle has been at work for multiple seasons. The brick face separates because water has saturated the brick interior, frozen, and expanded outward, breaking the bond between the outer surface layer and the brick body. Each subsequent freeze-thaw cycle separates more material.
Spalling appears in two distinct patterns on Seattle chimneys, each with different implications for urgency and repair scope:
- Isolated spalling — a small number of bricks showing face delamination, typically in locations with concentrated water exposure such as directly below a failed mortar joint, at chimney corners, or below a damaged crown. Isolated spalling indicates localized water infiltration and is addressed by repairing the water entry source and replacing the affected bricks. This is a repair of moderate cost once the moisture problem is resolved.
- Widespread spalling — multiple courses of brick showing face separation across a significant portion of the chimney. This indicates that water infiltration has been occurring over a broad area for multiple seasons, often in combination with a failed crown, multiple failing mortar zones, and a missing or damaged cap. Widespread spalling warrants urgent assessment — when significant volumes of the brick face have separated, the structural integrity of the affected courses is compromised.
On Seattle's pre-1940 homes, spalling is sometimes caused or significantly accelerated by prior Portland cement repointing applied to soft historic brick. If your inspection reveals spalling adjacent to relatively recent mortar repair work, this history is worth investigating before additional repairs are performed, as the cause influences the correct repair approach. Our guide to signs your chimney needs repair covers all the visual indicators homeowners can assess from the ground before calling a professional.
Post-Winter Repair Priority: What to Fix First and What Can Wait
After a Seattle winter, a homeowner might face an inspection report identifying multiple issues simultaneously. Understanding how to prioritize these findings determines whether you address a $400 flashing repair before the spring rains return, or wait until fall when a more expensive remediation is needed. The following table reflects how our technicians prioritize repair recommendations across more than 400 post-winter assessments per year in Seattle and King County:
| Damage Type | Urgency Level | Risk if Delayed | Typical Seattle Cost |
|---|---|---|---|
| Active flashing failure with water entry | Emergency — before next rain | Interior framing and ceiling damage escalates with every storm | $600 – $2,000 |
| Crown cracking (structural, through-depth) | High — within 2–4 weeks | Unrestricted water entry damages mortar and liner below | $600 – $2,200 |
| Missing or significantly damaged chimney cap | High — before nesting season | Wildlife entry, ongoing water damage to flue interior | $150 – $500 |
| Widespread brick spalling | High — assessment this season | Structural compromise; repair scope grows significantly | $1,000 – $4,000+ |
| Mortar joint tuckpointing (moderate deterioration) | Medium — within this season | Accelerating brick deterioration through next winter | $500 – $2,500 |
| Damper corrosion or restricted movement | Medium — before heating season | Energy loss, draft problems, wildlife entry | $200 – $600 |
| Crown cracking (hairline surface only) | Medium — within 6 months | Progressive cracking through next winter if unsealed | $250 – $500 |
| Isolated brick spalling (1–3 bricks) | Low-Medium — document and monitor | Cosmetic risk; minor if the water entry source is resolved | $200 – $600 |
The Sequencing Rule: Waterproofing Repairs First, Masonry Second
A critical repair principle that Seattle homeowners often overlook: water entry repairs must come before masonry repairs. Tuckpointing mortar joints while a failed crown is still admitting water is counterproductive — the new mortar begins taking on water immediately, and your investment in the repair is undercut from the start. The correct sequence is: (1) stop all water entry — repair crown, flashing, and cap first; (2) address masonry damage — tuckpointing, brick replacement, and refractory repairs once the chimney is dry; (3) consider waterproofing — a penetrating sealant applied to dry masonry extends the life of all the work performed in the prior steps. Our chimney waterproofing guide covers when and how to waterproof after repair. For full pricing across all repair types, see our Seattle chimney repair cost guide.
Schedule Your Post-Winter Chimney Repair With Seattle Chimney Pros
Seattle Chimney Pros provides post-winter chimney assessments and repair across the Seattle metro — from Queen Anne, Capitol Hill, and Ballard to Bellevue, Kirkland, and Tacoma. We are a family-owned company that has served more than 2,500 Seattle-area homeowners since 2011. Every assessment is performed by a CSIA-certified technician who inspects from the rooftop, documents all findings with photographs, and provides a written, itemized repair estimate before any work begins. We do not start work until you have reviewed and approved the scope and price.
May is the optimal month to address post-winter chimney damage in Seattle. The freeze-thaw season is over, the dry weather window (June through August) is approaching, and scheduling availability is better now than it will be when fall heating season creates peak demand across every chimney company in the metro. Damage addressed in spring is consistently less expensive than the same damage addressed in October, when additional water infiltration through another Seattle winter has compounded the repair scope and cost.
If your chimney showed any of the signs described in this guide — visible mortar deterioration, crown staining or cracking, interior water marks near the fireplace, a damaged or missing cap, or efflorescence on the exterior brick — the right step is a professional rooftop assessment while the repair is still straightforward. We also accept inspection reports from other certified inspectors and can provide repair estimates based on documented findings.
To schedule a post-winter chimney repair assessment, call (253) 429-8006 or request an appointment online. Most spring appointments are available within 3–5 business days, with priority scheduling for active leaks or safety findings. We serve 45 communities across King, Pierce, and Snohomish counties.
Need professional help?
Our professionally trained team is ready. Free estimate, 30-minute response.